Getting set up with Docker and the Ontology Development Kit
Installing Docker
Docker is the primary supported tool to use the ODK images (other containerization platforms are also supported, such as Singularity and – on macOS only – Apple Container, but they will not be covered here). Therefore, installing Docker is a pre-requisite before any work can be done with the ODK.
On GNU/Linux
Docker should be available in the package repositories of most GNU/Linux
distributions, though the name under which it is available may vary from one
distribution to another. On Debian for example, it is known as docker.io; on
Fedora, it is known as moby-engine.
You will need to ensure that the docker daemon is running whenever you wish to use the ODK. Most likely, the package of your distribution will have taken care of adding the daemon to the list of services that are automatically started at boot time; if not, check the documentation of your distribution to know how to do that.
As a last resort, should Docker not be available for your distribution, it can be built from the source code provided by the Moby project, though doing so is way out of scope for this document.
On macOS
Install Docker Desktop. Make sure to start the application whenever you need to use the ODK. You do not need to have a Docker account and to sign in when starting the application, though you can do so if you want.
On Windows
- Follow the instructions
here.
Note that you should have Windows 10 Professional installed for this to
work. We are not sure Docker Desktop works at all with Windows 10 Home, but
we have not tried in a while. If you know what you are doing, you could try
to configure Docker toolbox, but we have had many issues with it, and do not
recommend it unless absolutely necessary.
- If you are unable to install Docker Desktop on your Windows PC (e.g. no admin rights or prohibited by the IT department of your institution) but you have the ability to use the Windows Hyper-V-Manager (possible w/o admin rights) or another virtualization tool, such as VirtualBox, you could set up a Linux virtual machine (VM) to use ODK. We recommend using Lubuntu, as it won't need much computing resources. Although you cannot install Docker Desktop in such a VM, you can install the Docker Engine, which suffices to proceed with the next step.
- A much more convenient way to use a virtual Linux environment (with admin rights) is via the Windows Linux Subsystem (WSL) in Windows 10 and above. Installing it and the Docker Engine will allow you to use ODK in a Linux shell environment, while working with Protégé, GitHub Desktop and other possibly helpful apps like PyCharm, in your regular Windows GUI environment.
Checking Docker installation
Try running the following command in a terminal:
If you get an error about a “command not found” or similar, then Docker has not been installed properly.
If you get an error about being “unable to connect to the Docker daemon”, then Docker has been installed but in all likelihood the Docker daemon is not running: on macOS and Windows, make sure to launch the Docker Desktop application and try again; on GNU/Linux, check the documentation of your distribution to know how to start the daemon.
If you get a line that looks like this (exact column headers may vary depending on the version of Docker you have installed):
then Docker is up and running and you are ready to proceed to the next step.
Downloading the ODK image(s)
Run the following command:
This will download the ODKFull ODK image – this may take a while, depending on your Internet connection, but this only needs to be done once until a new version of the ODK is released.
If you are not planning to use any custom workflow in your ODK-managed repositories, you may download the ODKLite image instead, which is (slightly) smaller as it contains a smaller set of tools than ODKFull:
Installing the ODK Runner
Executing anything in a Docker container can quickly be cumbersome, because
the docker run command requires quite a few parameters that must be set
correctly. To make things easier, the recommended way to use the ODK image is
to use a small helper tool called the ODK Runner.
On GNU/Linux
Download the binary here,
rename it to odkrun into a directory that is in your system’s PATH, and
make sure it is executable. For example:
$ curl -L -O https://github.com/INCATools/odkrunner/releases/latest/download/odkrun-linux
$ sudo mv odkrun-linux /usr/local/bin/odkrun
$ sudo chmod 0755 /usr/local/bin/odkrun
(If you have a per-user directory that is listed in your PATH, such as
$HOME/.local/bin, you may install the command there instead.)
On macOS
Use the same method as for GNU/Linux above, just make sure to download the macOS binary (note that the same binary will work on both Intel and Apple Silicon machines):
$ curl -L -O https://github.com/INCATools/odkrunner/releases/latest/download/odkrun-macos
$ sudo mv odkrun-macos /usr/local/bin/odkrun
$ sudo chmod 0755 /usr/local/bin/odkrun
On Windows
Download the binary here
and put it into a directory that is in your system’s PATH.
Unfortunately, as far as the author of those lines knows, Windows does not
have a pre-made directory already in the PATH, intended for custom
executable programs (akin to GNU/Linux and macOS’ /usr/local/bin directory),
so you are going to have to make one (we do not recommend putting the ODK
Runner binary directly under C:\Windows\System32, though that is a
possibility).
Create an AppData\Local\bin directory in your home’s directory and download
the runner into that directory:
mkdir "%USERPROFILE%\AppData\Local\bin"
curl -L -o "%USERPROFILE%\AppData\Local\bin\odkrun.exe" https://github.com/INCATools/odkrunner/releases/latest/download/odkrun.exe
Now you need to add %USERPROFILE%\AppData\Local\bin to your user account’s
PATH. See this discussion on StackOverflow, for an
illustrated procedure to do that.
Checking that the ODK Runner is properly installed
After following the procedure above that is appropriate for your operating
system, you should be able to call the odkrun command from any terminal
regardless of what your current directory is.
Check that by running:
You should get a message like this (version number may vary):
odkrun 0.5.0
Copyright (c) 2026 Damien Goutte-Gattat

This program is released under the 3-clause BSD license.
See the COPYING file for more details.
If you don’t, go back to the procedure above. Maybe check that your PATH
variable does include the directory where you put the odkrun file (echo
$PATH on GNU/Linux and macOS; echo %PATH% on Windows).
Alternatives to the ODK Runner
If for some reason the ODK Runner cannot be used, wrapper scripts around the
docker run command are also available:
Download the script for your system and place it in the directory where you
intend to work with the ODK. Invoke the script with sh odk.sh (GNU/Linux,
macOS) or odk.bat (Windows).
For the specific purpose of seeding a new ODK-managed repository, dedicated wrapper scripts are also available:
- for GNU/Linux and macOS: seed-via-docker.sh
- for Windows: seed-via-docker.bat
Memory settings
One of the most frequent problems with running the ODK for the first time is failure because of lack of memory.
There are two different settings involved:
- How much memory is your Docker installation allowed to use. This is a hard upper bound limit – no process running within a Docker will be able to use more than the maximal amount of memory that Docker is configured with.
- How much memory are Java applications (especially ROBOT) within the container allowed to use.
The first setting is configured in Docker’s preferences. With Docker Desktop (macOS, Windows), this is done in the Preferences dialog, tab Resources, subtab Advanced) (see picture below).
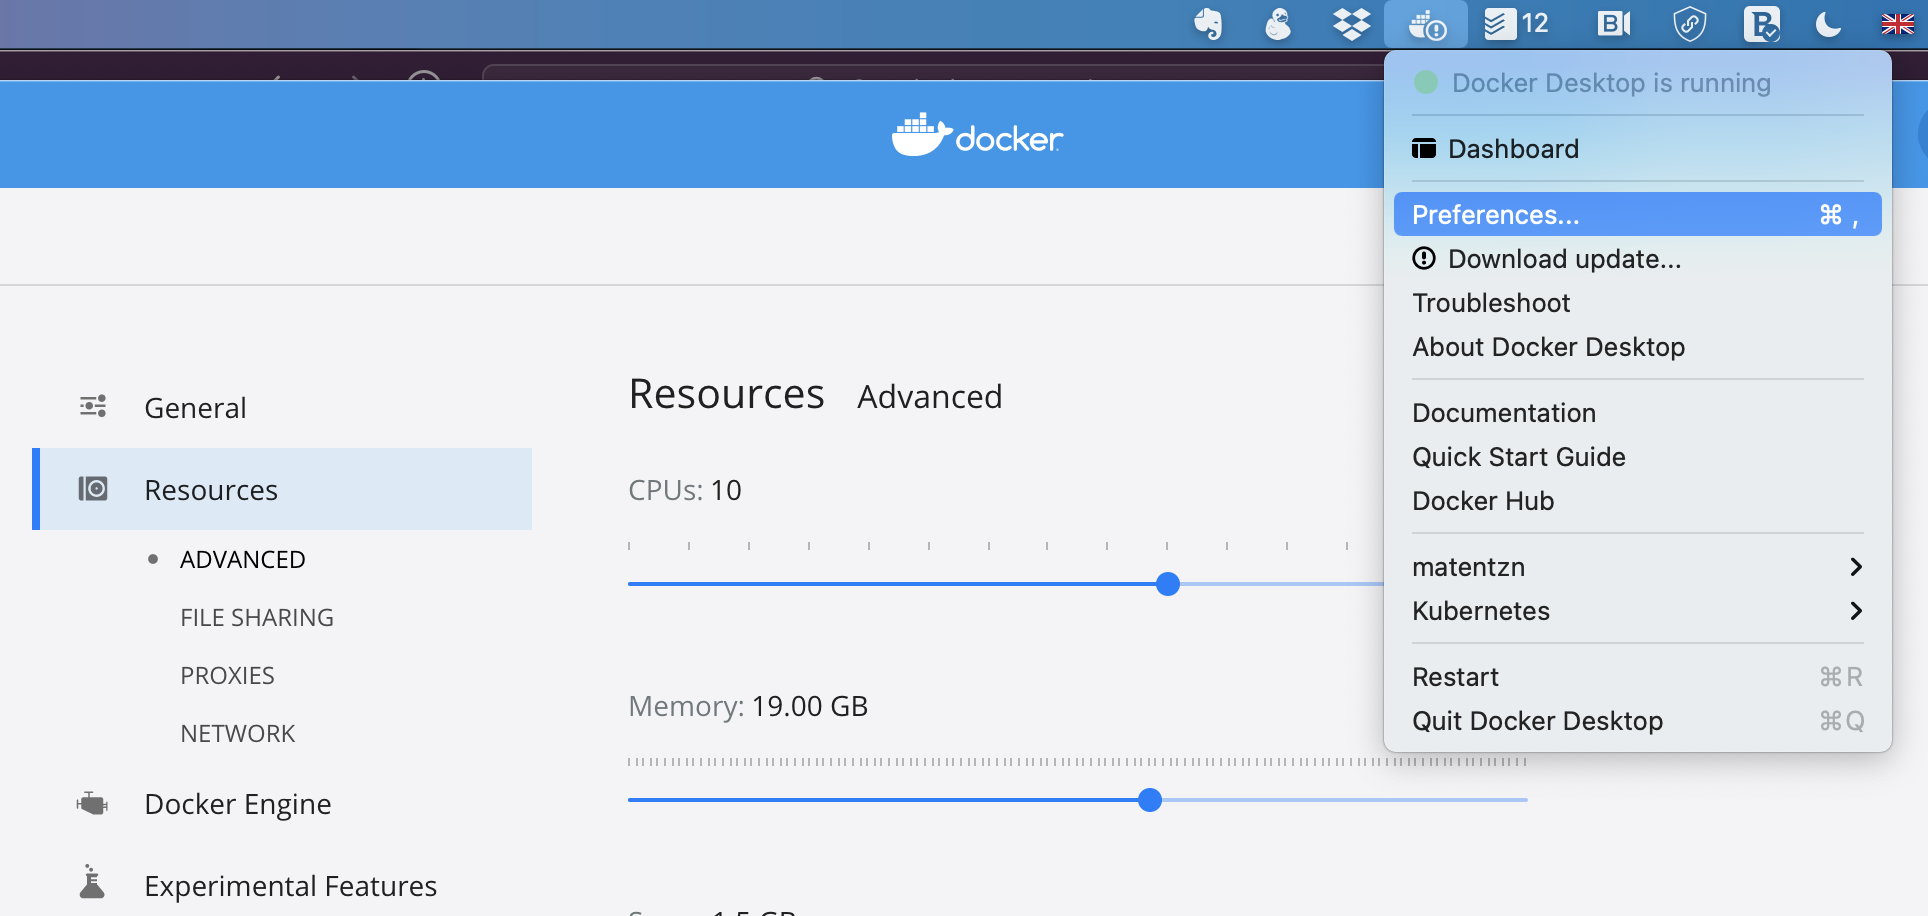
On GNU/Linux, on a typical Docker installation the docker daemon is not constrained and can use as much memory as is available on the machine. If you do run into memory issues, check the documentation provided with your distribution about possible distribution-specific constraints.
When using the ODK Runner, the second setting is automatically set to up to 90% of the memory allocated to Docker, and so users should not normally have to worry about it.
When using a wrapper script such as those mentioned above, you may need to
edit the wrapper script to set the required maximal amount of memory in the
ROBOT_JAVA_ARGS and JAVA_OPTS options (one of the reasons why using such
wrappers is discouraged in favour of using the ODK Runner).
More intelligent pipeline design
If your problem is that you do not have enough memory on your machine, the only solution is to try to engineer the pipelines a bit more intelligently, but even that has limits: large ontologies require a lot of memory to process when using ROBOT. For example, handling ncbitaxon as an import in any meaningful way easily consumes up to 12GB alone. Here are some tricks you may want to contemplate to reduce memory:
robot queryuses an entirely different framework for representing the ontology, which means that whenever you use ROBOT query, for at least a short moment, you will have the entire ontology in memory twice. Sometimes you can optimse memory by seperatingqueryand otherrobotcommands into seperate commands (i.e. not chained in the samerobotcommand).- The
robot reasoncommand consumes a lot of memory.reduceandmaterialisepotentially even more. Use these only ever in the last possible moment in a pipeline.